Have you noticed the weird Outlook View recently? You might wonder how to fix it and restore the initial folder views. Well, you have landed on the right page since we are going to show you how to do it correctly.
The Reading Pane might have been turned off before, or a Size column might have been added to appointment lists, or other settings might have been changed. If you want to go back to the original folder views in Outlook, this article will show you how to do so. No, we don’t think so. Here, we’ll show you how to get Microsoft Office to show folders the way they used to show them before.
Using Rest View feature in Outlook
You may utilize the Reset View option in Microsoft Outlook to restore the default appearance of folders.
From the menu bar, select the option View > Reset View. Here’s an example of what I mean:

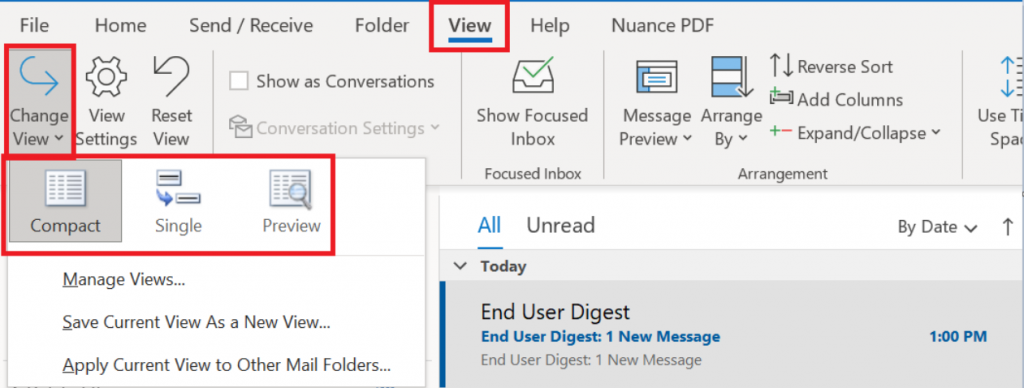
First, click to choose a folder in the Navigation Pane, then click the View > Change View button and select the view mode from the drop-down list that you wish to restore.
A warning notice will be shown in a dialog box. Make sure you choose ‘Yes‘ when prompted.
All files are restored to their original condition when this procedure is completed. Please refer to the next section if you want to apply this view to more folders.
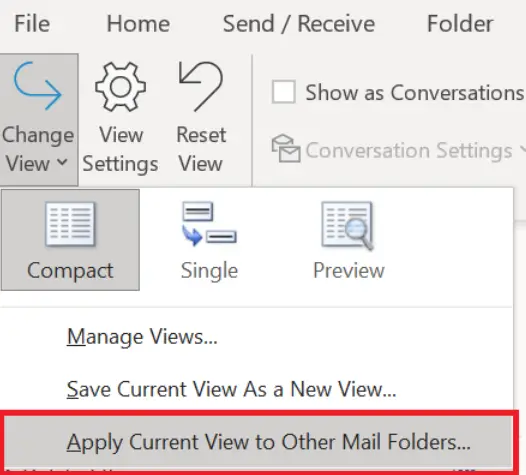
Change your current view to be applied to all other mail folders by selecting this option from the Change drop-down menu on the View tab. Here’s an example of what I mean:
Reset Folder Views in Outlook 2007
Microsoft Outlook 2007’s default folder views can be retrieved using the steps outlined in the section below.
- The original view may be restored by selecting View > Current View > Messages or another view as needed in the folder where you want to restore the original view.
- From the drop-down menu, select View > Current View > Customize Current View.
- You may revert to the default view by clicking Reset Current View at the bottom of the Customize View dialog box.
- To dismiss the warning dialog box, click the OK button.
The OK button on the toolbar will exit the Customize View: Messages dialog box.
Cleaning All View Settings
Cleaning all view settings will allow you to revert back to the default views for all folders.
The initial views of all folders can be restored using an alternate approach that can be used all at once.
- Close Microsoft Outlook and open the Run dialog box by hitting the Windows key and the R key at the same time.
- In the Open: box, type the command outlook.exe /cleanviews, and then click the OK button.
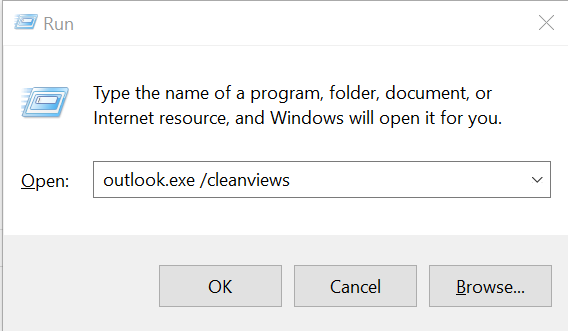
After that, Microsoft Outlook opens with all folders’ default views restored to their normal settings right away.
Selecting Different – Existing View
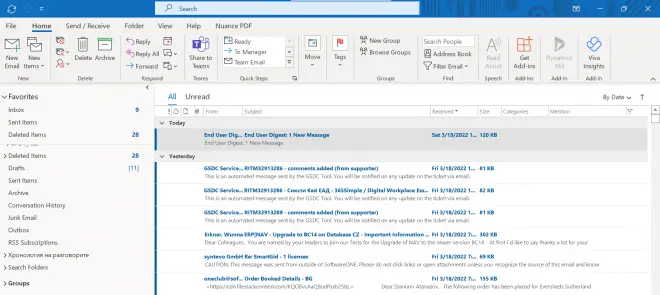
Outlook’s Inbox view can be changed to meet your needs. You should open Outlook’s Inbox folder before you make any changes to the Inbox screen. Then, on the Ribbon, click “View”. Take a look at the “Current View” button group to see what’s going on now. After that, you can use any of the menu views to make your Inbox look the way you want. All three options have already been chosen: “Compact,” “Single,” and “Preview.” Viewing in “Compact” mode is the only way you can see it.
When you want to open the “Manage All Views” dialog box, click on “Manage Views…” from this menu. The folder’s views and settings can be seen in this window. You can change any view, or you can undo any changes that have been made to a view. This dialog box lets you add, change, or remove custom views. Outlook’s folder views can be changed with a similar dialog box.
Create a New Custom View
A new Outlook view may be created by clicking this button: New… The “Create a New View” dialogue box has been shown on the screen. ” The new view’s name is: “text box”
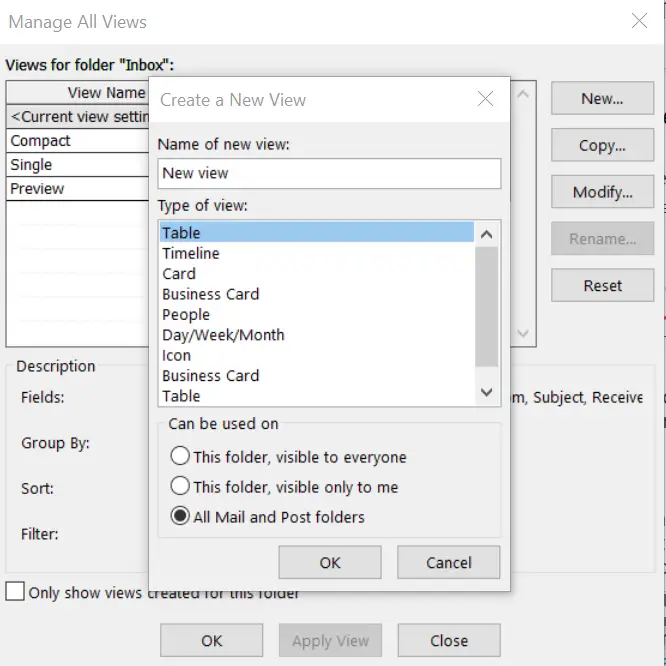
Please choose from the options below. Table: Items are shown in rows and columns in this layout. This option displays the number of times a certain item has been utilized over the course of time. Other choices are “Card,” “Business Card,” “People,” “Icon,” and “Card.”
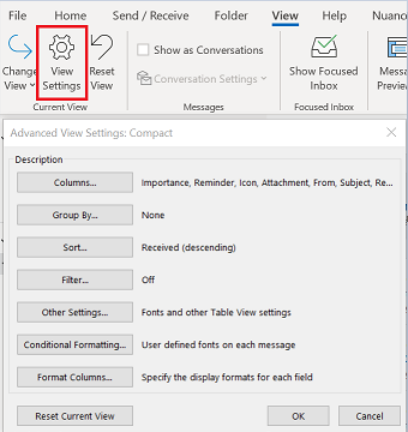
Decide who will be able to see it after that. All of my mail and post folders may view this folder, or it can only be accessed by me alone. For more advanced view settings, click OK in the “Advanced View Settings” dialog box. There are seven buttons in this dialog box that allow you to change the complexity of the view settings. Depending on your default view type, you may not be able to see all of the buttons.
Adding columns to the View
It appears in Outlook when you click on the “Column…” option from the “Advanced View Settings” dialog box. The “Advanced Display Settings” dialog box can be closed if you don’t wish to add any more columns to the display. Click OK once you’ve selected the drop-down menu in the form’s upper-left corner to show the desired fields in the left list…
Add a new field to the right-hand list by selecting one from the left-hand list and clicking the “Add” button. The “Move Up” and “Move Down” buttons make it easy to move a field in the list of columns up or down a column by choosing it from the right-hand list and then clicking the corresponding buttons. In order to finish the field adding and sorting, click “OK” at the end.